This is Unit 0, focusing on web design. In this Engineers blog, I want to introduce some of the topics I’ve been working on daily. This time, I will explain how to use the WordPress plugin, Elementor. By using the Elementor plugin, you can intuitively create web page layouts with drag-and-drop operations. No programming skills are required. In this post, I will explain the basic usage of Elementor.
Elementor Installation and Validation
Elementor is not compatible with all WordPress themes, so we recommend using a supported theme. For this example, we are using the official Elementor theme: HelloElementor.
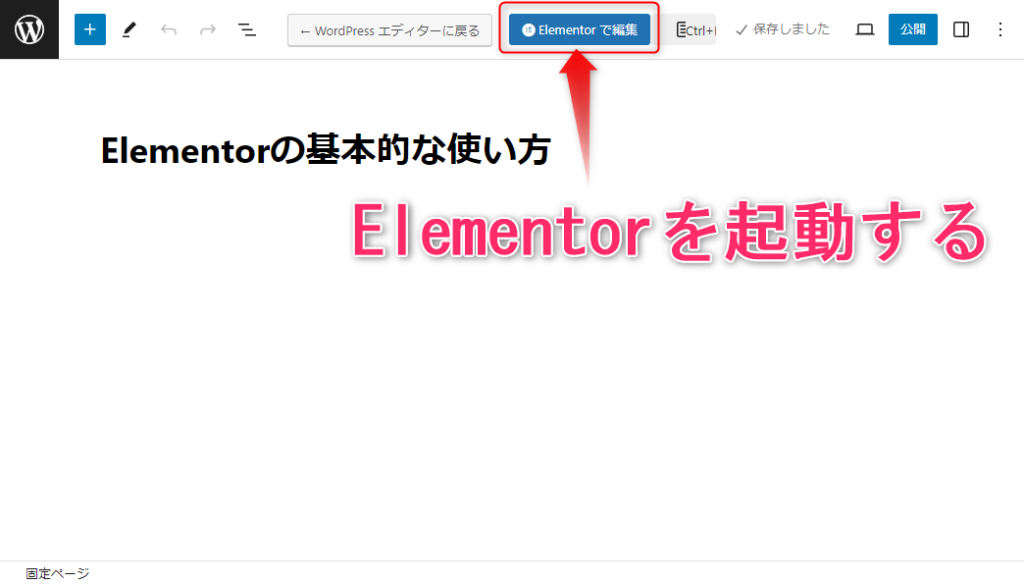
Booting Up Elementor
Go ahead and create a new fixed page. Now selsect “Edit with Elementor”
About Elementor Widgets
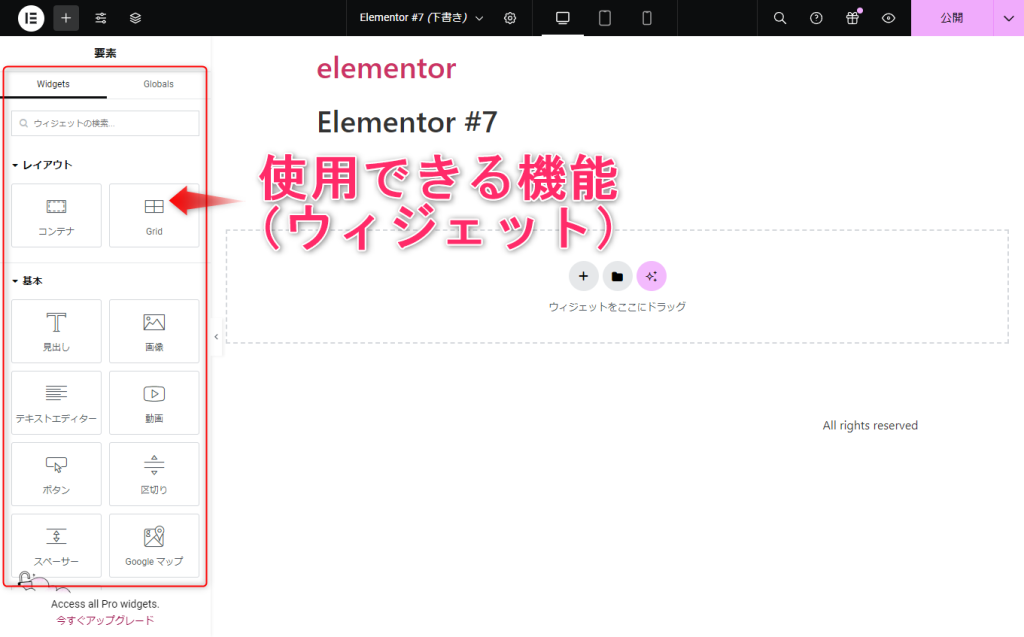
The features provided by Elementor are called “widgets.” You can see a list of widgets on the left side of the screen.
With the paid version, you can access more widgets. As of September 2024, there are four plans available for the paid version, with upgrades ranging from $59 to $399 per year.
Creating a Layout
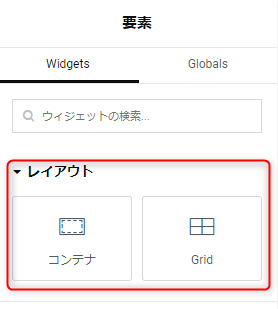
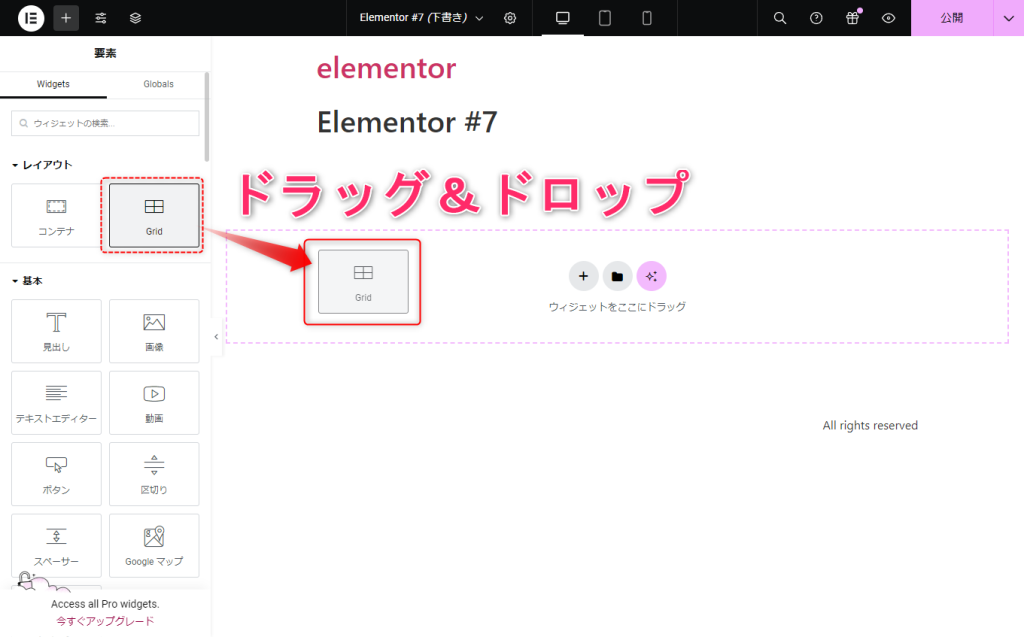
First, use the “Layout” widget to determine the structure of your web page.
In Elementor, there are two types of page layouts: Flexbox and Grid.
In earlier versions, Elementor layouts were made up of “Sections,” but in recent updates, the concept of “Containers” has been introduced leading to the deprecation of “Sections”.
In this example, we will create a layout using a Grid.
By default, a Grid layout with 3 columns and 2 rows will be created.
Detailed settings can be adjusted by clicking “Edit Grid” on the left side of the screen.
Placing Elements in the Grid
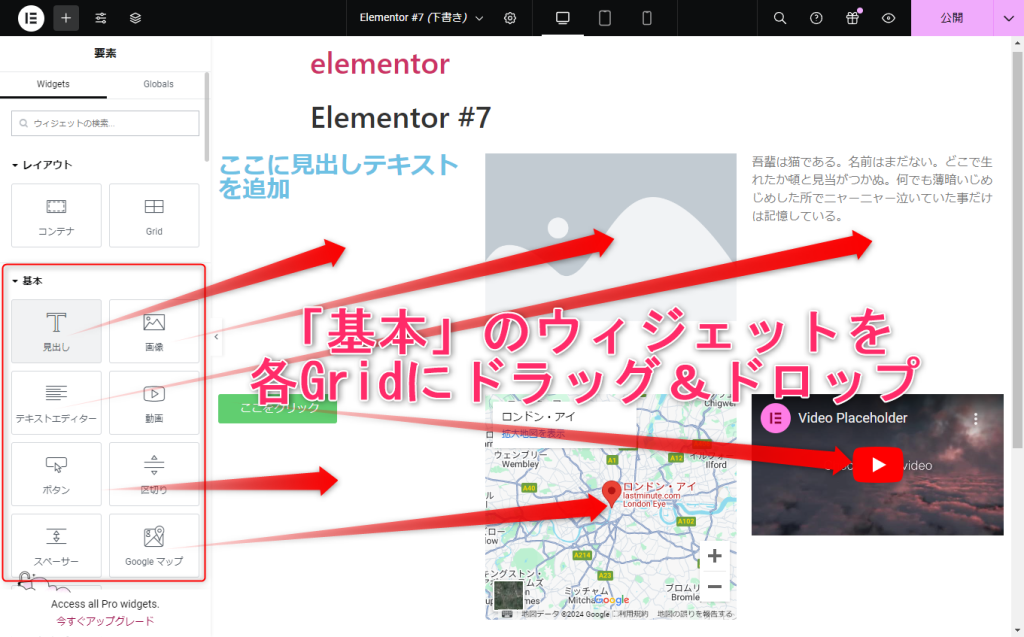
You can easily create a web page by placing elements from the basic widgets.
Simply by using mouse operations, you can easily position content commonly used on web pages.
In the future, I plan to cover more detailed setting methods.
As introduced previously, you can also easily conduct tests using the “LOCAL” environment so please give it a try.
As a technical blog, I would like to introduce the learning content that I am working on on a daily basis.
This time, it is the second unit, which is themed on low-code development.
Theme of this time: “About Outsystems Developer Cloud” We, the second unit, are currently conducting low-code development using OutSystems 11, and in this blog we introduce the development method and other aspects. This time, we will introduce “OutSystems Developer Cloud”, which was released in Japan by OutSystems in April 2023.
What is an Outsystems Developer Cloud?
Outsystems Developer Cloud (hereinafter referred to as ODC) is a cloud-native (created to run on the cloud) low-code application development platform provided by OutSystems.
It is based on the native cloud service of Amazon Web Service (AWS) and supports Kubernetes, Linux containers, microservices, etc.
Technologies used in ODC
As a cloud-native platform, ODC uses technologies to provide benefits such as agility, availability, and fault tolerance, and is used to support the above services. Here are some of those technologies.
Microservices Microservices is a technique for building one large application by combining multiple independent small services through communication via APIs and web services. Since the correlation between individual functions is low, failures or increased load in one function are less likely to affect other functions. In addition, since changes and expansions of functions can be made only to the target service, agility in changes and expansions is high. However, since it is more difficult to maintain consistency as a whole system than creating a single application, attention must be paid to the design of the whole system, data management, and API management.
Containerization Containerization is a technology in virtualization technology that combines the elements required to run in any computing environment (from the execution environment to the application) into one package. It enables rapid development without having to worry about the underlying environment.
Autoscaling Autoscaling is a function that monitors the CPU and RAM usage of each application and automatically increases or decreases the capacity of the application according to the load. Autoscaling allows the build service and other services to be used simultaneously without degrading the performance of the platform.
Advantages of ODC
Usually, building a cloud-native application platform requires huge costs and time. With ODC, OutSystems handles the tedious work involved in building it, so you can introduce cloud-native services with less effort than building it from scratch.
Although there are some differences from OutSystems’ existing low-code development platform, OutSystems 11, there are no major differences in basic functions.
With ODC, you can design, develop, and deploy by taking advantage of the high productivity of OutSystems 11 and the advantages of cloud-native services.
Currently, ODC does not have a free trial that you can immediately install like Outsystems 11, but UI images of the development screen are posted on the Outsystems website.
If you have not tried Outsystems products, try installing a trial of Outsystems 11 first and compare it with the ODC screen.
About the trial installation of Outsystems 11: Engineer blog: Introducing Outsystems and creating sample screens – dandelionS Blog About the ODC UI: UI overview of ODC Portal and ODC Studio – ODC Documentation (outsystems.com)
Summary
This time, we introduced “Outsystems Developer Cloud”. Our company is currently using OutSystems 11, so in the future I would like to delve deeper into the differences between OutSystems 11 and ODC, how to use them for development purposes, and what to do if you want to migrate to ODC!
In the second unit, we will continue to publish blogs for engineers using low-code tools such as OutSystems, so stay tuned.
As a technical blog, I would like to introduce the learning content that I am working on on a daily basis. This is the first unit on the theme of AI and big data. The theme this time is OpenAI’s latest model, ChatGPT-4o. For each section, we will have ChatGPT4o create images and image descriptions.
In the world of artificial intelligence, OpenAI has always been at the forefront of innovative advancements, especially in the field of large-scale language models (LLMs). The newly announced ChatGPT-4o represents a breakthrough in the field of conversational AI, introducing various enhancements that allow users to interact with language in unprecedented ways.
Unlocking the Power of ChatGPT-4o ChatGPT-4o builds on the foundations of its predecessor, ChatGPT, and introduces a set of sophisticated features that take its capabilities to new heights. Let’s take a closer look at the key features that set ChatGPT-4o apart.
Enhanced Speed and Efficiency:
ChatGPT-4o runs twice as fast as its predecessor while cutting computational costs in half. This incredible efficiency translates into a smoother and more responsive user experience, especially when conducting complex tasks or long conversations.
Expanded Message Limits:
Free users of ChatGPT-4o now have a 5x increase in message allowance, allowing them to interact with the model for extended periods of time without restrictions and explore its full potential. This answers the growing demand to freely explore language capabilities.
Multilingual Mastery:
ChatGPT-4o transcends language boundaries, enabling seamless conversations across multiple languages. This multilingual capability allows users to engage in meaningful interactions with audiences around the world, fostering intercultural understanding and cooperation.
Multimodal Integration:
ChatGPT-4o seamlessly integrates text, audio, and visual data for a more comprehensive and immersive conversational experience. This multimodal capability opens new avenues for creative expression, knowledge exploration, and interactive storytelling.
Explore the applications of ChatGPT-4o ChatGPT-4o’s enhanced features empower users across a range of sectors to explore its potential.
Content Creation:
ChatGPT-4o can be a powerful tool for content creators, generating a variety of creative text formats, translating languages accurately, and creating engaging content that resonates with audiences.
Education and Learning:
In the education sector, ChatGPT-4o innovates the learning experience by providing personalized instruction, answering questions in an informative manner, and generating summaries of complex topics. This personalized approach caters to individual learning styles and promotes deeper understanding.
Business Solutions:
Businesses can leverage ChatGPT-4o in a variety of ways to enhance their operations. From developing customer service chatbots that provide 24/7 support to conducting market research analysis and generating compelling marketing copy, ChatGPT-4o streamlines business processes and drives growth.
Conclusion: A Look into the Future of Conversational AI ChatGPT-4o marks an important milestone in the evolution of conversational AI, offering a glimpse into a future where humans and machines can interact with unprecedented levels of understanding and nuance. Its enhanced speed, expanded features, and multilingual capabilities will make ChatGPT-4o a valuable tool for individuals and organizations across sectors. As ChatGPT-4o continues to evolve, we expect to see even more groundbreaking applications emerge, transforming the way we communicate, learn, and create.
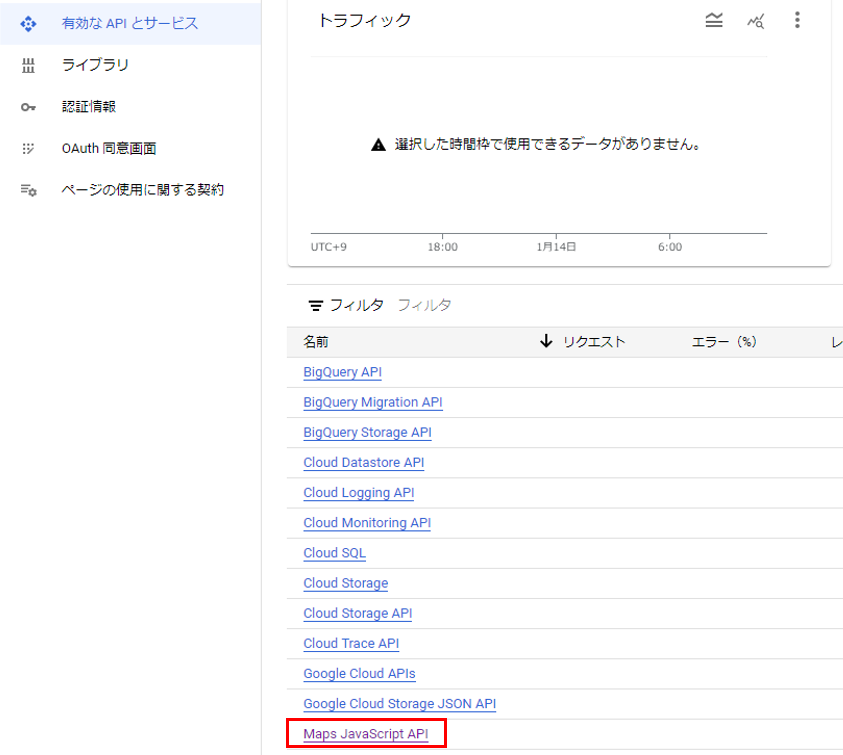
script>(g=>{var h,a,k,p="The Google Maps JavaScript API",c="google",l="importLibrary",q="__ib__",m=document,b=window;b=b[c]||(b[c]={});var d=b.maps||(b.maps={}),r=new Set,e=new URLSearchParams,u=()=>h||(h=new Promise(async(f,n)=>{await (a=m.createElement("script"));e.set("libraries",[...r]+"");for(k in g)e.set(k.replace(/[A-Z]/g,t=>"_"+t[0].toLowerCase()),g[k]);e.set("callback",c+".maps."+q);a.src=`https://maps.${c}apis.com/maps/api/js?`+e;d[q]=f;a.onerror=()=>h=n(Error(p+" could not load."));a.nonce=m.querySelector("script[nonce]")?.nonce||"";m.head.append(a)}));d[l]?console.warn(p+" only loads once. Ignoring:",g):d[l]=(f,...n)=>r.add(f)&&u().then(()=>d[l](f,...n))}) ({key: "{APIキー}", v: "beta"});</script>