
As an engineer blog, I would like to introduce the learning content that I am working on on a daily basis.
This is the second unit with the theme of low-code development.
This time’s theme: “Using JavaScript in Outsystems”
In our second unit, we regularly use Outsystems for low-code development.
Outsystems provides tools that allow you to develop intuitively by dragging and dropping parts without having to code as much as possible.
However, if you want to implement details such as the UI part as you want, there may be cases where the properties provided by Outsystems are not enough.
In such a case, you may be able to implement your ideal by using JavaScript. This time I will introduce one such example.
今回やりたいこと
This time, I would like to change the UI of DataGrid in Outsystems using JavaScript.
Specifically, we will introduce the following contents.
・Cancel the DataGrid’s default setting of coloring every other row.
・Color a specific column of DataGrid with your favorite color
How to use DataGrid
How to use the OutSystems Data Grid
DataGridのデフォルト色付け設定を解除する
First, we will change the coloring of every other row of the grid, which is set by DataGrid by default.
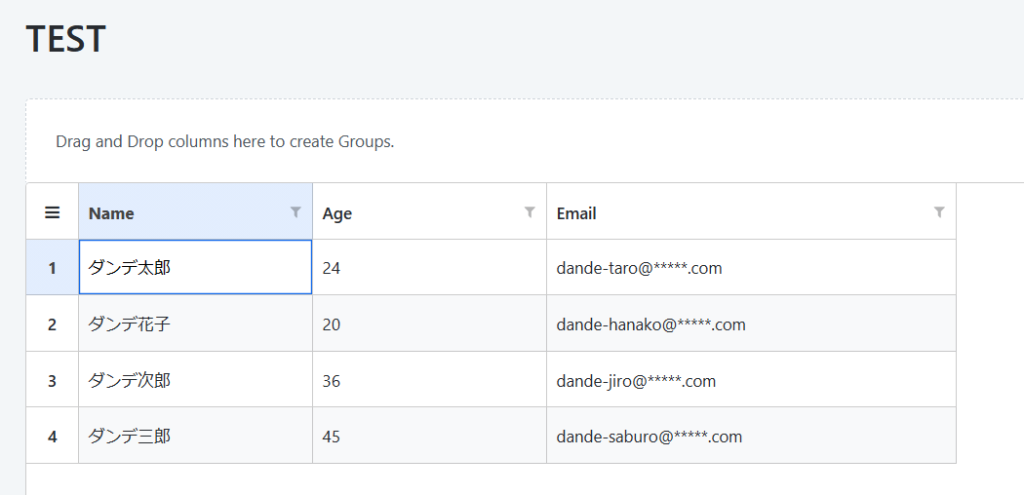
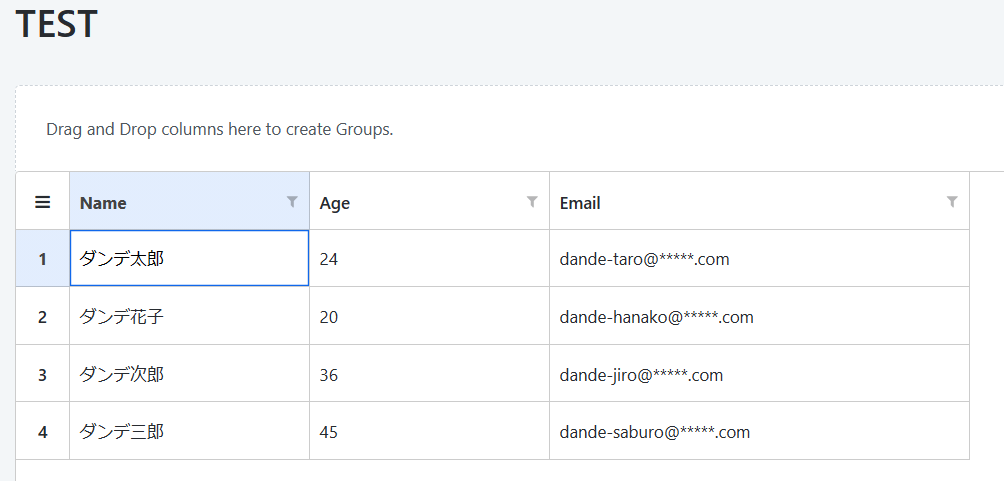
Normally, if no settings are made, every other row of the grid will be colored automatically, as shown below.
We will change this using JavaScript.
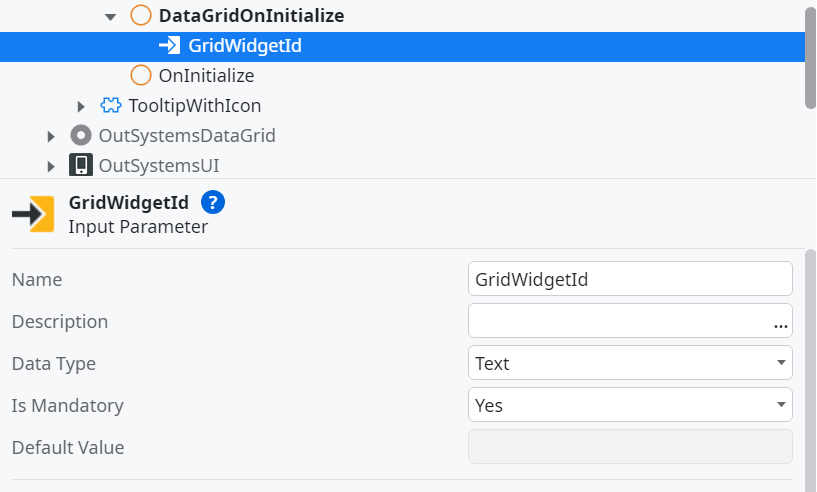
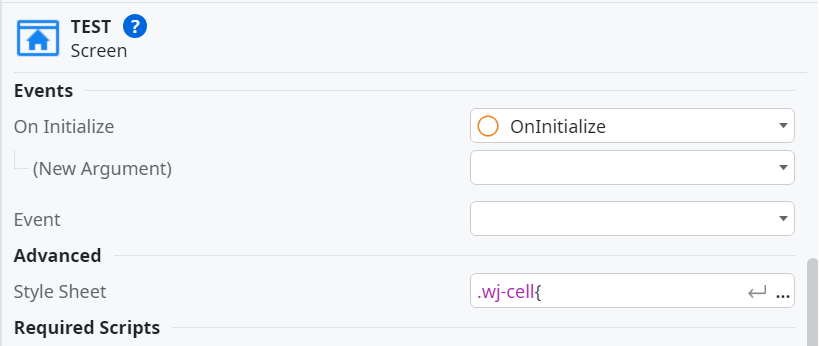
First, prepare a ClientAction (DataGridOnInitialize) for displaying the DataGrid in the screen element where the grid is located, and add an Input parameter called GridWidgetId.
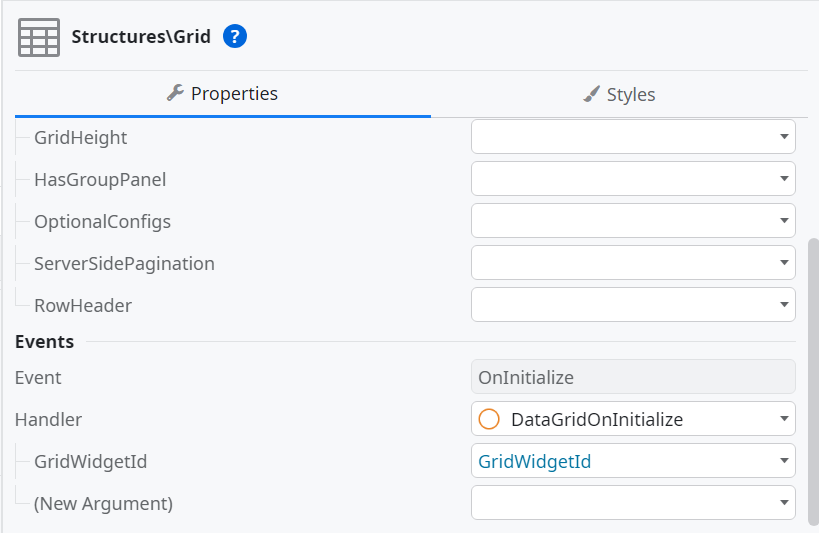
Next, in the Event item of the DataGrid property to which you want to apply JavaScript, set the ClientAction you created earlier to Handler.
At this time, also set the GridWidgetId added with the Input parameter.
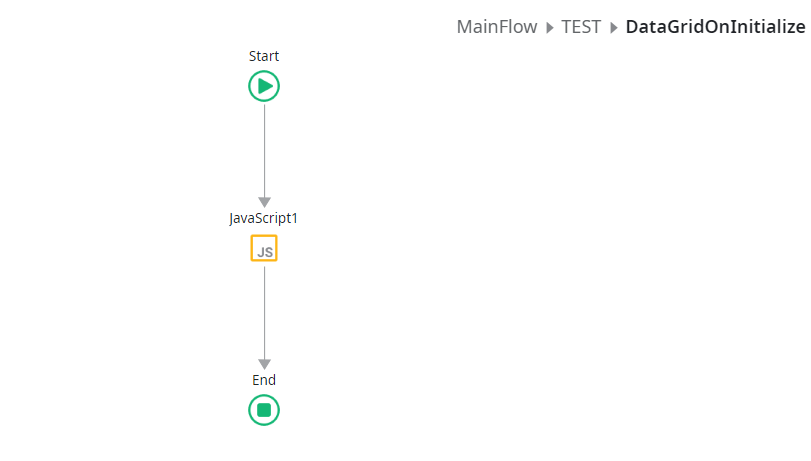
Set the following JavaScript in the ClientAction you created last.
(When defining a variable in JavaScript, the Input parameter GridWidgetId is specified.)

//Get the Grid information created on the screen var grid = GridAPI.GridManager.GetGridById($parameters.GridWidgetId).provider; //Abolish coloring for each row grid.alternatingRowStep = 0;
Color only specified columns of DataGrid
Next, we will use JavaScript to color only specific columns of the grid.
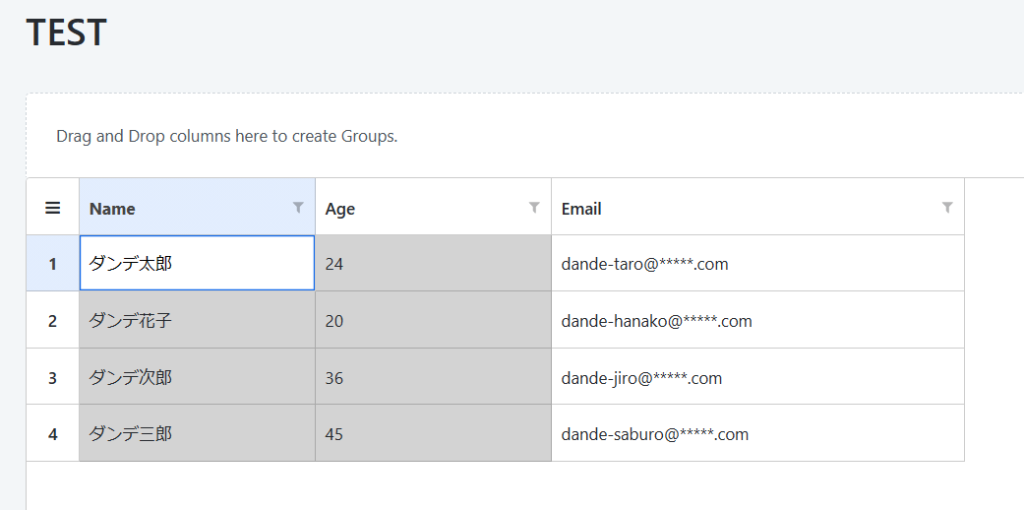
I would like to color only the Name and Age columns in the grid above in gray to make it easier to visually understand that they are non-editable columns.
This time, we will implement it by first coloring the entire grid gray, and then making only the editable Email column white.
First, write the following CSS in the Style Sheet of the screen.
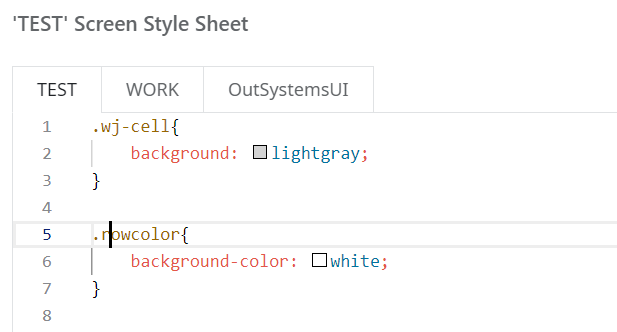
.wj-cell{
background: lightgray;
}
.rowcolor{
background-color: white;
}
Next, add the following code to the JavaScript in ClientAction to complete the process.
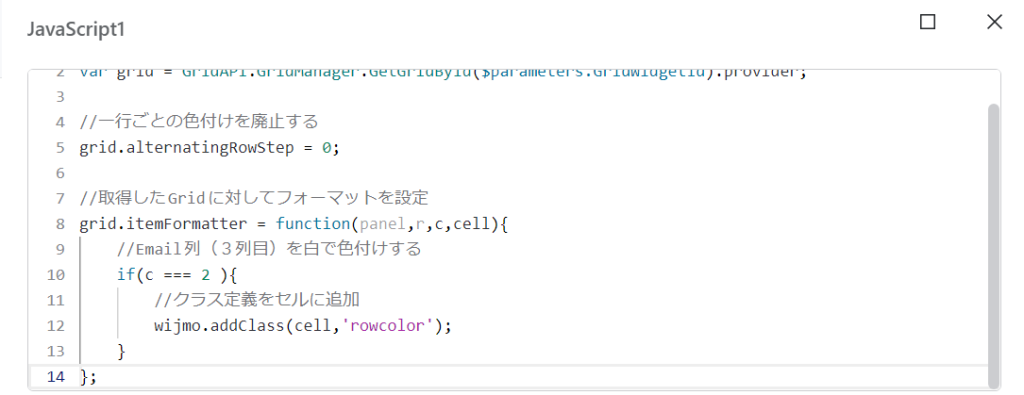
//Set format for the acquired Grid
grid.itemFormatter = function(panel,r,c,cell){
//Color the Email column (3rd column) with white
if(c === 2 ){
//Add class definition to cell
wijmo.addClass(cell,’rowcolor’);
}
};
Summary
As you can see, OutSystems provides a variety of properties, but I found that you can implement them the way you want by using JavaScript.
It felt like I was able to reach out to a specific area of concern, and I felt that the scope of development was expanding.
Why not consider using JavaScript if you cannot achieve the desired results using Outsystems properties alone?
In the second unit, we will continue to develop blogs for engineers using low-code tools such as OutSystems, so please look forward to it.