Engineer Blog – Automatic Column Generation in OutSystems Data Grid

In this engineer blog, I’ll introduce what I’ve been learning recently. This time, I’ll explain automatic column generation in OutSystems Data Grid.

  • OutSystems Data Grid is a spreadsheet-like grid that can be displayed and interacted with within an OutSystems application.
  • This article assumes prior knowledge of OutSystems Data Grid.

Problem Statement

For example, let’s say we have a grid like the one below.

The usual way to create it would be as follows.

  1. Set the data to be displayed into a Structure that matches the grid layout, convert it into a list, transform it into JSON using ArrangeData, and set the resulting JSON as the grid’s data.
  2. Place a column widget on the grid for each column to be displayed, and configure each header, column width, display conditions, and so on.

For a grid with six columns like the one above, it’s not too difficult. However, if the number of columns to display is variable, creating it becomes more challenging.

You need to determine the maximum number of columns to display, then prepare the Structure from step 1 and the column widgets from step 2 to match that maximum number. Additionally, you must control the visibility of each column based on how many you actually want to display. As a result, all the columns up to the maximum exist, but only the desired number of columns are visible.

Especially for step 2, if the grid’s configuration is even slightly complex—such as having merged headers with dynamic labels—the amount of work required increases significantly.

If the maximum number is around 100, it might take some time, but it’s still manageable. However, I once faced a case where the maximum number reached nearly 1,500. At that time, I looked into whether it was possible to generate the grid columns using JavaScript.

As a result of the automatic generation, step 1 of the usual method still needs to be done as is, but step 2 becomes much simpler.

Prerequisites

In a grid like the one below, the columns outlined in red are the target for automatic generation. (The left three columns are placed as usual. The auto-generated columns are on the right.)

The cells in the auto-generated columns will be set to read-only. The column order in the grid will be fixed and cannot be changed.

The data to be displayed in the grid has already been retrieved and is set to the grid as described in step ① above.

The header labels (such as ‘グループ1’, ‘データX’, ‘名名名’, etc.) are dynamic and have already been retrieved in a format that can be passed into JavaScript. (In the sample JavaScript code, these input parts will be shown in bold.)

In the implementation JavaScript, we use a variable called dataGrid. You can obtain dataGrid as shown below. (Let gridId be the ID of the configured grid.)

var dataGrid = OutSystems.GridAPI.GridManager.GetGridById('gridId').provider;

Preliminary Research

From the link below, I found that it’s possible to push columns into dataGrid.columns.

https://www.outsystems.com/forums/discussion/80001/outsystems-data-grid-is-is-possible-to-add-columns-dynamically-on-datagrid/

Upon further investigation of dataGrid, I found that in addition to columns, there is also columnGroups. I thought that by pushing to columnGroups, it might be possible to create grouped, merged header columns.

Implementation Flow

In the ‘On After Fetch’ action after retrieving the data, implement it as follows.

The first column of ‘グループ1’

The second column of ‘グループ1’

the ‘グループ2’ column

As shown above, grouped columns with merged headers are created one by one.
By adjusting the structure of newColGroup and the target of the push accordingly, it should be possible to create column groups with different structures.

additional support

When automatically generating columns, the following two points must be taken into consideration.

  • The variable dataGrid represents the grid obtained as a JavaScript object. At the time the ‘On After Fetch’ action is executed after data retrieval, the grid must already exist. One way to handle this is to set the data retrieval action’s timing to ‘Only on Demand’ and execute it in the ‘OnReady’ action.
  • If the grid contains columns with editable cells, a post-edit check is performed on the entire row to determine whether any cells were edited. However, if this check tries to access the automatically generated columns, it will result in an error. (In the grid used as an example in this article, the ‘Settings’ column is editable.)

To handle this, adjust the edit check in the grid’s ‘OnInitialize’ action using JavaScript as shown below.

Stay tuned for the next developer blog.

技術者ブログ – OutSystems Data Gridにおける列自動生成

技術者ブログとして日ごろ取り組んでいる学習内容をご紹介します。今回は、OutSystems Data Gridにおける列自動生成について説明します。

  • OutSystems Data Gridは、OutSystemsのプログラムの中で表示・操作できる、Excelのようなグリッドになります。
  • 本記事は、OutSystems Data Gridについての知識を前提とします。

問題設定

例えば、以下のようなグリッドがあるとします。

通常の作成方法は、以下になると思います。

  1. 表示するデータを、グリッドの構造に合わせたStructureに設定して、リスト化して、ArrangeDataでJSONの変換して、結果のJSONをグリッドのデータとして設定する
  2. グリッドに、表示する列の件数分、列ウィジェットを配置して、それぞれのヘッダ、列幅、表示条件などを設定する

上記のような、列が6件のグリッドの場合、さほど難しくないと思いますが、表示したい列の数が可変の場合、作成が難しくなります。

表示できる最大数を決定して、「1.」のStructureの項目数と、「2.」の列ウィジェットは、それぞれ、その最大数の件数分を用意しなければなりません。そして、各列の表示条件を、表示したい個数に合わせて制御しなければなりません。結果として、最大数の件数分の列が存在しているが、表示した件数分のみが見えています。

特に「2.」については、グリッドの仕様が少しでも複雑(重複ヘッダで、その文言が動的など)でしたら、必要な作業量が著しく増えていきます。

決定した最大数が、例えば100件ぐらいでしたら、多少時間がかかりますが、できなくはない程度になると思いますが、以前、最大数が1500件近くになる場合に直面したことがあります。その際に、グリッドの列をJavaScriptで生成できないか、調べてみました。

自動生成の結果、上記の通常の作成方法の「1.」は、そのまま実施しなければなりませんが、「2.」の方が、簡単になります。

前提

以下のようなグリッドでは、赤枠の列を自動生成の対象します。(左3列は、通常通り配置した列となります。自動生成の列は、右となります。)

自動生成の列のセルを編集不可とします。グリッドの列順を変更不可とします。

グリッドで表示するデータは、取得済みで、上記の①のようにグリッドに設定します。

ヘッダの文言(「グループ1」、「データX」、「名名名」など)を可変として、取得済みで、JavaScriptにインプットできる形で持っています。(実装例のJavaScriptコードの中で、このようなインプット部分を太文字にします。)

実装のJavaScriptで、dataGridという変数を使います。dataGridは、以下のように取得できます。(gridIdは、設定したグリッドのIdとします。)

var dataGrid = OutSystems.GridAPI.GridManager.GetGridById('gridId').provider;

事前調査

以下のリンクで、dataGridのcolumnsに列をpushできることが分かりました。

https://www.outsystems.com/forums/discussion/80001/outsystems-data-grid-is-is-possible-to-add-columns-dynamically-on-datagrid/

dataGridを細かく調査すれば、columnsの他に、columnGroupsもあると分かって、columnGroupsに対するpushで、グループ化された重複ヘッダの列群を作成できるのではないかと考えました。

実装の流れ

データ取得後のOn After Fetchアクションで、以下のように実装していきます。

「グループ1」の最初の列

「グループ1」の二つ目の列

「グループ2」の列

上記のように、グループ化された、重複ヘッダの列を1つずつ作成していきます。newColGroupの構造、push先のところを適宜調整すれば、異なる構造の列群を作成できると思われます。

追加対応

列自動生成にあたり、以下の2点を留意しなければなりません。

  • 変数dataGridは、グリッドをJavaScriptオブジェクトとして取得したものになります。データ取得後のOn After Fetchアクションが実行される時点で、グリッドが存在しなければなりません。一つの対応方法として、データ取得アクションのタイミングをOnly on Demandに設定して、OnReadyアクションで実行することができます。
  • グリッドに、セルが編集可能な列がある場合、セル編集後、行全体に対して実施されるセル編集有無チェックは、自動生成列のセルをチェックしようとしたら、エラーとなります。(本記事で例として使ったグリッドでは、「設定」列が編集可能とします。)

対応するには、グリッドのOnInitializeアクションのJavaScriptで、以下のように編集有無チェックを調整します。

次回の技術者ブログをお楽しみに。

Employee Introduction

Thank you for viewing.
I’m “Em,” from the Business Development Department, and I’ll be handling this employee introduction article.
I’ll share why I joined Dandelions and my thoughts on joining the company.

What Prompted Me to Join the Company

In my previous role, I began my career as a systems engineer (SE) after joining the company as a new graduate and spent ten years in that position. I gained extensive technical knowledge and experienced significant growth, finding the work deeply rewarding.

However, following a shift in company policy, I embarked on a new career path as a sales professional for the next ten years. Although it was a completely different field, it proved to be invaluable experience. I honed my skills in directly listening to and proposing solutions for customer needs while leveraging the IT knowledge I had cultivated in the field.

My experience in sales was also highly valuable, but I always harbored a strong desire to return to the forefront of technical development as an IT specialist once again.

Around that time, I was introduced to an opportunity by someone I had worked with during my stint as a systems engineer. I became convinced that I could once again pour my passion into the IT work I truly wanted to do, and thus decided to change jobs.

After my employment was confirmed, as I listened to the details, I discovered an even more surprising fact.

Actually, during my time in sales, I had already met you as a client and conducted business with you. The connection formed during my days as a systems engineer, through my relationship with you as a client during my sales period, ultimately led to my joining the company. I feel it was a truly valuable connection.

I possess two distinct perspectives: technical expertise as a systems engineer and the ability to deeply understand customer challenges cultivated through sales experience.
I believe this unique background is my greatest strength, one that sets me apart from others.

Life After Joining

Following my reasons for joining the company, I’d like to share my honest impressions since joining.
It’s been about seven years since I joined. When I decided to change jobs and took the leap into this new environment, what struck me most immediately was how every single employee radiated a passion to “make this company better with our own hands” and was filled with positive energy.

What particularly impressed me was how everyone opened their hearts and listened to my opinions and suggestions, even though I was a new member.
The kindness in your hearts at that time and your attitude of respecting my opinions gave me a great sense of security and joy as I worked in this new environment.
It was precisely because I felt accepted that I was able to quickly become an active member of the company and engage enthusiastically in my work.

Recently, with the addition of many foreign members and young employees from the new generation, the company has become even more vibrant. Currently, regardless of nationality or age, we are able to work together in a truly “harmonious and friendly” atmosphere, respecting one another.
Being able to experience this process of change and growth as a member of the organization is also a source of joy.

Dandelions and Dogs

That’s all for this time.
Stay tuned for the next employee spotlight!

社員紹介

ご覧いただき、ありがとうございます。
今回社員紹介の記事を担当します、業務開発部所属の「えむ」です。
ダンデライオンズに入社したきっかけ・入社した感想についてお話します。

入社したきっかけ

前職では、新卒で入社してから10年間、システムエンジニア(SE)としてキャリアをスタートさせました。技術面で学びが多く成長でき、大きなやりがいを感じていました。

しかし、会社の方針転換に伴い、その後10年間は営業職として新たなキャリアを歩むことになりました。畑違いの業務でしたが、現場で培ったITの知識を活かしつつ、お客様のニーズを直接伺い、提案するスキルを磨く貴重な経験となりました。

営業職での経験も大変有意義でしたが、やはり「もう一度、ITの専門職として技術開発の最前線に戻りたい」という強い想いが常にありました。

そんな折、システムエンジニアとして働いていた時期に業務でご一緒したことのある方から、ご紹介いただきました。そして、本当にやりたかったITの仕事に再び情熱を注げると確信し、転職を決意いたしました。

入社が決まり、お話を聞いていく中で、さらにびっくりする事実が判明しました。

実は、私が営業職をしていた時期に、お客様の立場で既にお会いし、ビジネスのやり取りをさせていただいていたというのです。システムエンジニア時代のご縁が、営業時代のお客様との関係を経て、最終的に入社へと繋がった。貴重なご縁だなあと感じています。

私は、SEとしての技術的な専門性と、営業として培ったお客様の課題を深く理解する力という、二つの異なる視点を持っています。
このユニークな経験こそが、人にはない最大の強みだと考えています。

入社した感想

入社のきっかけに続き、入社してからの率直な感想をお話しさせていただきます。
私が入社したのは約7年前になります。転職を決意し、新たな環境に飛び込んだ時、まず強く感じたのは、社員一人ひとりが「この会社を自分たちの手でより良くしていこう」という熱意と、前向きなエネルギーに満ち溢れていることでした。

特に印象的だったのは、新しいメンバーである私の意見や提案にも、皆さんが心を開いて耳を傾けてくださったことです。
その時の皆さんの「気持ちの優しさ」と、意見を尊重してくれた姿勢は、新しい環境で働く上での大きな安心感と喜びにつながりました。
「受け入れてもらえている」という感覚があったからこそ、私もすぐに会社の一員として積極的に業務に取り組むことができました。

最近では、外国籍のメンバーや、新しい世代の若手社員が多数入社し、会社はより一層活気にあふれています。現在、私たちは国籍や年齢に関係なく、お互いを尊重し合いながら、文字通り「和気あいあい」と仕事を進めることができています。
この変化と成長の過程を、組織の一員として感じることができてることも喜びになっています。

たんぽぽと犬

今回は以上となります。
次回の社員紹介もお楽しみに!

[Dandelions Café] What Makes a Company One I’d Want to Stay With

What is Dandelions Café?

At Dandelions, we regularly hold communication events to deepen mutual understanding among team members and build stronger collaboration.
These events and discussions take place in a relaxed, café-like atmosphere that transcends departments and job titles—just like chatting over coffee. That’s why we call this initiative “Dandelions Café.”

This time, the theme was “What Makes a Company One I’d Want to Stay With.”
Teams spent about two hours researching and discussing the topic, followed by presentations from each group.

Ideas born from diverse perspectives

Through the presentations, we got a glimpse into how each member views the company in their daily work and what they truly think.
The opinions stood out in two main categories: an active perspective, focusing on how we can contribute to the company’s growth, and a passive perspective, reflecting what kind of environment we expect from the company to keep working there.

Opinions from an active perspective

  • Opinions that reflect an awareness of the types of talent and actions needed for the company’s growth
  • such as creating systems—like organizing manuals—that prevent workload from being concentrated on specific employees

These reflected the perspectives of team members who are clearly mindful of the organization’s overall dynamics in their daily work.

Opinions from a passive perspective

  • Adequate salaries to keep up with rising living costs
  • Enhanced employee benefits such as transportation and housing allowances
  • Expansion of remote work options

The desire for a comfortable and secure work environment left a strong impression.

There were also some unique ideas!

  • Lavish rewards for perfect attendance each month
  • A system that allows employees to bring their pets to work

Some suggestions aimed at making the company atmosphere more enjoyable brought smiles to our faces.

A discussion that led to new insights and learning

Through this theme, we discovered just how much perspectives can differ depending on one’s role and experience—even within the same company.
It felt like a valuable opportunity for both leadership and younger team members to understand each other’s ways of thinking.

Differences in opinions can sometimes appear as gaps, but looking at it another way, they’re simply different expressions of the same desire—to make the company even better.
This discussion offered valuable insights for Dandelions to continue growing and evolving.

After the discussion, we had our usual social gathering.

At Dandelions, we’ll continue to value open dialogue across all roles and positions, as we work together to create a company that’s not only easier to work in, but also a place where everyone can grow even more.

Stay tuned for our next blog post!

【ダンデライオンズカフェ】自分が続けたいと思える会社の特徴について

ダンデライオンズカフェとは

ダンデライオンズでは、メンバー同士の相互理解を深め、より良い協力関係を築くことを目的に、コミュニケーションイベントを定期的に開催しています。
イベントやディスカッションは部署・役職の枠を越えて、まるで“カフェで語り合う”ようなカジュアルな雰囲気で行われるため、私たちはこの取り組みを 「ダンデライオンズカフェ」 と呼んでいます。

今回のテーマは 「自分が続けたいと思える会社の特徴」
チームに分かれて約2時間の調査・ディスカッションを行い、その後、各チームがプレゼンテーションを実施しました。

さまざまな視点から生まれた意見

プレゼンテーションでは、メンバー一人ひとりが普段どのように会社を見ているのか、その思いを知ることができました。
意見は大きく分けると、「会社の成長に向けて自分たちがどう関わるか」を考える 能動的な視点 と、「働き続ける上で会社にどのような環境を期待するか」という 受動的な視点 の二つが印象的でした。

能動的な視点の意見

  • 会社が成長していくために、どのような人材や行動が求められるかを意識した意見
  • 手順書の整備などにより、特定の社員に負荷が集中しない仕組みづくり

これらは、日頃から組織全体の動きを意識しているメンバーらしい視点でした。

受動的な視点の意見

  • 物価高に対応した十分な給与
  • 交通費、住宅手当などの福利厚生の充実
  • リモートワークの拡充

「働きやすさ」や「安心できる環境」を求める声が印象的でした。

その他、ユニークなアイデアも!

  • 毎月皆勤賞に豪華景品を贈呈
  • ペットと一緒に出勤できる制度

会社の雰囲気づくりをより楽しくする提案として、思わず笑顔になる意見もありました。

気づきと学びにつながったディスカッション

今回のテーマを通じて、同じ会社にいても、立場や経験によってこんなにも視点が変わるのかという発見がありました。
経営層にとっても若手メンバーにとっても、お互いの考え方を知る貴重な機会になったと感じています。

意見の違いは、ときにギャップとして現れますが、裏を返せば 「会社をもっと良くしたい」という思いが、形を変えて表れている ともいえます。
今回の話し合いは、ダンデライオンズがより成長していくための大きなヒントになりました。

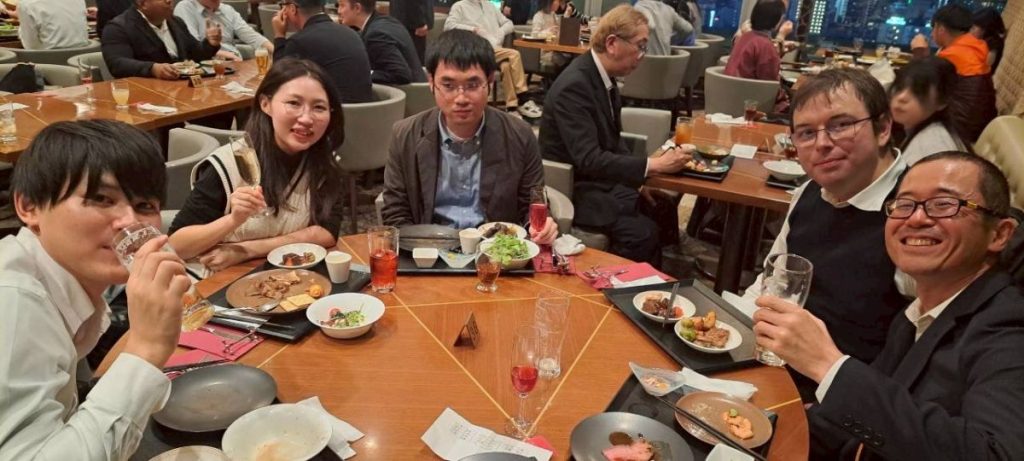
ディスカッション後は恒例の懇親会

これからもダンデライオンズでは、立場に関係なく意見を交わせる場を大切にしながら、
「もっと働きやすく、もっと成長できる会社」づくりを進めていきます。

次回のブログもどうぞお楽しみに。

Engineer Blog: Generating PDFs Using Ultimate PDF in OutSystems

As part of our engineer blog, we’d like to share what we’ve been learning day by day.
This time, it’s Team 2, focusing on low-code development.

This Time’s Theme: ‘PDF Output Using Ultimate PDF

This time, we’ll show you how to export screen data within OutSystems as a PDF.

What is Ultimate PDF?

Ultimate PDF is one of the Forge components available in OutSystems. It allows you to export web pages (HTML + CSS) as PDFs.
For example, you can generate PDFs of formatted content like invoices, reports, business cards, and forms.

Installing Ultimate PDF

Launch Service Studio, search for ‘Ultimate PDF’ via Browse Forge, and install it.

Adding References to the Module

Open the module you want to use, go to Manage Dependencies (CTRL+Q), select the necessary elements from Ultimate PDF, and click the Apply button.
(This time, we selected PrintLayout, HideOnPrint, and PrintToPDF_Advanced.)

Descriptions of each element are as follows.

PrintLayout: A layout template used to optimize screens for printing or PDF output.

HideOnPrint: A CSS class (style setting) for screen design that, as the name suggests, hides specific elements during printing.

PrintToPDF_Advanced: An advanced function that allows for more detailed settings when converting HTML screens (web pages) into PDFs.

Creating a Screen for Output

To create a screen for output, follow the same steps as when creating a regular Screen. Place ‘PrintLayout’ on the screen and design the layout you want to export as a PDF.

For any text you don’t want to appear in the PDF output, add ‘HideOnPrint’ to the screen and place the text inside it.

Creating a Server Action for PDF Output

This time, we’ll place an output button on the screen we created earlier and set up a Server Action that triggers a download when the button is pressed.

The properties for each action are as follows
・PrintToPDF_Advanced: Under Action, set the URL of the screen you want to export (in this case, we’re using the current screen’s URL), the PDF page size, and the PDF margins.

*We didn’t use it this time, but in Environment, you can finely control HTML rendering methods, wait conditions, and CSS application settings.

・Download: Under Action, set the return value from PrintToPDF_Advanced and the name of the PDF.

Here is the PDF we actually generated.

*Text that wasn’t meant to be output has been removed.

Important Notes

・Be careful when choosing between Client Action and Server Action. Since PDF generation is generally handled on the server side, calling it from a Client Action by mistake may result in it not working properly.

・Always enclose the FileName in double quotation marks (“”).If not specified like \”Test.pdf\”, it will result in an error

・Screens with a large amount of information are more likely to time out. If there are many tables or images, PDF generation may take longer.

Summary

In this article, we introduced how to generate PDF files from OutSystems using Ultimate PDF.
Since it can also output images and graphs, be sure to try it out in apps that generate reports or forms.
Team 2 will continue to share technical blogs using low-code tools like OutSystems, so stay tuned!

技術者ブログ:(OutSystems)Ultimate PDFを使ったPDF出力

技術者ブログとして日ごろ取り組んでいる学習内容をご紹介します。
今回は、ローコード開発をテーマにしているチーム2です。

今回のテーマ:『Ultimate PDFを使ったPDF出力』

今回はOutSystems内にある画面データをPDFとして出力する方法をご紹介します。

Ultimate PDFとは

OutSystemsに搭載されているForgeコンポーネントのひとつで、
Webページ(HTML+CSS)をPDFとして出力できます。
例えば、請求書・報告書・名刺・帳票などレイアウトされた内容をPDF化できます。

Ultimate PDFのインストール

Service Studioを起動しBrowse Forgeより”Ultimate PDF”で検索してインストールを行います。

モジュールへの参照追加

利用したいモジュールを開き、Manage Dependencies(CTRL+Q)よりUltimate PDFの要素を必要な分選択しApplyボタンをクリックします。
(今回はPrintLayout、HideOnPrint、PrintToPDF_Advancedを選択しました)

各要素の説明は以下の通りです。

・PrintLayout …”画面を印刷やPDF出力に最適化するためのレイアウトテンプレート” です。

・HideOnPrint …画面デザインで使えるCSSクラス(スタイル指定)のひとつで、その名の通り「印刷時に非表示にしたい要素」に付けるための機能です。

・PrintToPDF_Advanced …HTML画面(Webページ)をより細かく設定してPDF化できる拡張版の関数です

出力用の画面の作成

出力用の画面を作るときですがScreenを作る時と同じ要領で作成します。
画面に”PrintLayout”を配置しPDF出力したい画面を作成します。

PDF出力する際に出力されてほしくない文字は”HideOnPrint”を画面に追加しその中に文字を入力します。

PDF出力用のSever Actionの作成

今回は上記で作成した画面に出力ボタンを配置し押下時にダウンロードするServerActionを作成します。

各アクションのプロパティは以下の通りです。
・PrintToPDF_Advanced…Action>出力したい画面のURL(今回は現在の画面URLを取得しています)、PDFの画面サイズ、PDFの余白をそれぞれ設定します。

※今回は使っていませんがEnvironmentではHTMLの描画方法・待機条件・CSS適用方法などを細かく制御できます。

・Download…Action>PrintToPDF_Advancedの戻り値、PDFの名前をそれぞれ設定します。

実際に出力したPDFはこちら

※出力したくない文字は消えている

注意事項

・Client Action と Server Action の使い分けに注意。
PDF生成は基本的にサーバー側で行うため、誤って Client Action から呼び出すと正しく動作しない場合があります。

・FileName には必ずダブルクォーテーション(””)を付ける。
"Test.pdf" のように指定しないとエラーになります。

・画面の情報量が多いとタイムアウトしやすい。
テーブルや画像が多いと生成に時間がかかります。

まとめ

今回はUltimate PDFを使ってOutSystemsからPDFファイルを出力する方法をご紹介しました。
画像やグラフなども出力できますので帳票やレポート出力を行うアプリでぜひ活用してみてください。
チーム2ではこれからもOutSystemsなどのローコードツールを使った技術者ブログを展開していきますのでお楽しみに!

August 2025 Internship Experience

In August, we hosted an internship program at our company, with two Japanese students and one international student participating.
This time, we would like to introduce the three participants.

Japanese students(Male)

I recently had the opportunity to participate in the Dandelions summer internship program.
This was my first internship ever, and I was nervous, but I was warmly welcomed.

During this internship, I had the opportunity to experience three main areas of work.
On the first day, we decided on the content and text patterns for LINE stickers, which also served as a team icebreaker. All team members freely shared their opinions, and we were able to proceed with discussions while keeping the end users in mind.

On the second day, I had the opportunity to experience system testing. Even inspecting just one feature of a website involved a considerable amount of work, requiring intense concentration and perseverance. It made me truly appreciate the difficulty of the actual job.

On the third day, we created a web design for a festival in the Tokai region. Since it was intended for an international audience, we divided the work between writing the introduction and handling the translation. We also decided on the site layout ourselves, making it a rather interesting project.

This internship provided me with a valuable experience, allowing me to learn about aspects of working life and business etiquette such as exchanging business cards.

Japanese students(Male)

I would like to express my gratitude for the opportunity to participate in the internship program at Dandelions Inc.

On the first day, we mainly worked on “creating LINE stickers” and “writing self-promotion statements.”
Regarding the LINE sticker creation, I found it enjoyable to brainstorm ideas with students’ daily usage in mind and felt motivated to engage enthusiastically.
Regarding the self-promotion statement writing, while I found creating the mind map challenging, I also genuinely felt it made writing the promotional text easier.

On the second day, we primarily focused on “business card exchange/system testing.”
Regarding the business card exchange, although I had no prior knowledge of the basic procedures, thanks to the thorough explanations, hands-on practice, and advice provided, I felt I was able to grasp the process smoothly.
Regarding the system testing, while the task of documenting evidence was challenging, it also provided a sense of accomplishment.

On the third day, we mainly focused on “Market Research/Web Design Experience.”
Regarding the market research, I realized that finding and transcribing the desired information for the theme of Tokai festivals was more difficult than I had imagined.
Regarding the web design experience, although I had never used WordPress before, I found it to be a very easy-to-use and convenient tool once I got used to it.

Myanmar international students(Female)

I attended a company information session held by Global Aichi, became interested, and participated in an internship at Dandelions Inc. The internship lasted five days, from August 18th to 22nd.
On the first day, we created LINE stickers. We send LINE stickers to friends, colleagues, and family, using them almost daily. However, I think few people have ever considered how LINE stickers are actually made. To be honest, I hadn’t either.

On the second day, we experienced testing, and on the third day, we experienced website design. For both the testing and website design experiences, we first received an explanation and then practiced. Through experiencing testing and website design, I realized that concentration and organization are indeed crucial in the IT industry. We were also taught business etiquette, including exchanging business cards, and practiced it.

Every day I studied new things, discussed with everyone, and worked on tasks. Through the internship, I learned that new things should be challenged, and the importance of planning and teamwork. I’m glad I participated in the internship.

2025年8月インターンシップ体験談

8月に当社でインターンシップを行い、日本人学生2名、外国籍留学生1名に参加いただきました。
今回は参加いただいた3名の方を紹介いたします。

日本人学生(男性)

この度、ダンデライオンズの夏季インターンシップに参加させていただきました。
私はこれが人生初のインターンシップで不安だったのですが、温かく迎え入れていただきました。

今回のインターンシップでは大きく分けて三つの内容を体験させていただきました。
初日はチームのアイスブレイクもかねて、LINEスタンプの内容と文字の柄を決めました。チームメンバー全員が忌憚なく意見を出し合い、使用するお客様のことも考えたうえで話し合いを進めることができました。

二日目にはシステムテストの体験をさせていただきました。あるサイトの機能の一つだけを検査するにもかなりの量があり、集中力と根気が必要な業務でした。実際の業務の大変さを思い知ることになりました。

三日目には東海地方のお祭りに関してのWebデザインを作らせていただきました。海外の方に向けて発信するものだったので、紹介文の記述と翻訳作業を分担して行いました。サイトのレイアウトなども自分たちで決めたのでなかなか面白い仕事でした。

今回のインターンシップでは、社会人の仕事の一端と、名刺交換などのビジネスマナーを学ぶことができ、とても良い経験をすることができました。

日本人学生(男性)

この度は、株式会社ダンデライオンズ様のインターンシップに参加させて頂きました。

1日目は主に「LINEスタンプ作成/自己PR作成」に取り組みました。
LINEスタンプ作成の感想として、学生の日常使いを意識して案を出していく作業が楽しく、意欲的に取り組むことが出来たと感じました。
自己PR作成の感想として、マインドマップ作成に難しさを感じましたが、PR文章が書きやすくなったのも実感することが出来ました。

2日目は主に「名刺交換/システムテスト」に取り組みました。
名刺交換の感想として、基本動作を何も知らない状況でしたが、丁寧な説明・実践・アドバイスのおかげで、スムーズに理解することが出来たと感じました。
システムテストの感想として、エビデンスを残す作業は大変でしたが、同時に達成感も得ることが出来ました。

3日目は主に「市場調査/ウェブデザイン体験」に取り組みました。
市場調査の感想として、東海の祭りというテーマに対して、欲しい情報を探し文字に起こすことが、思っているよりも難しいと実感することが出来ました。
ウェブデザイン体験の感想として、WordPressは今まで触ってきませんでしたが、慣れるととても使いやすく便利なツールだと感じました。

ミャンマー人留学生(女性)

私はGlobal Aichiが行った会社説明会に参加して興味を持ち、株式会社ダンデライオンズのインターンシップに参加しました。インターンシップは8月の18日から22日まででの五日間でした。
一日目は、Lineスタンプを作りました。私たちはラインスタンプを友達、同僚、家族に送って、ほぼ毎日使っています。しかし、Lineスタンプがどのように作られているかを考えたことがあるひとは少ないと思います。実際に私も考えたことはなかったです。

二日目はテスト体験をして、三日目はウェブサイトデザイン体験をしました。テストとウェブサイトデザインの体験は、まず説明を受けて、実践しました。テストやウェブサイトデザインを体験したことによって、IT業界はやはり集中力と整理することが重要であることが分かりました。また、ビジネスマナーとして名刺交換についても教えてもらい、実践しました。

毎日新しいことを勉強し、皆と話し合い、作業を行いました。インターンシップを通じて、新しいことは挑戦するべきであること、計画やチームワークの重要性を学びました。インターンシップに参加して、よかったです。