In this engineer’s blog, I’d like to share some of the topics I’ve been studying. This time, the focus is on researching Web Design Trends for 2025.
Theme: Web Design Trends for 2025
How is the world of web design expected to evolve in 2025?
To explore the latest developments, I referred to the following article:
- [2025] Top 10 Web Design Trends Selected by Web Designers – Mininare [Web Production Company Syscom]
Notable Design Elements
While paying attention to web-specific techniques and evolving technologies, I’ve summarized some of the key trends expected to gain traction.
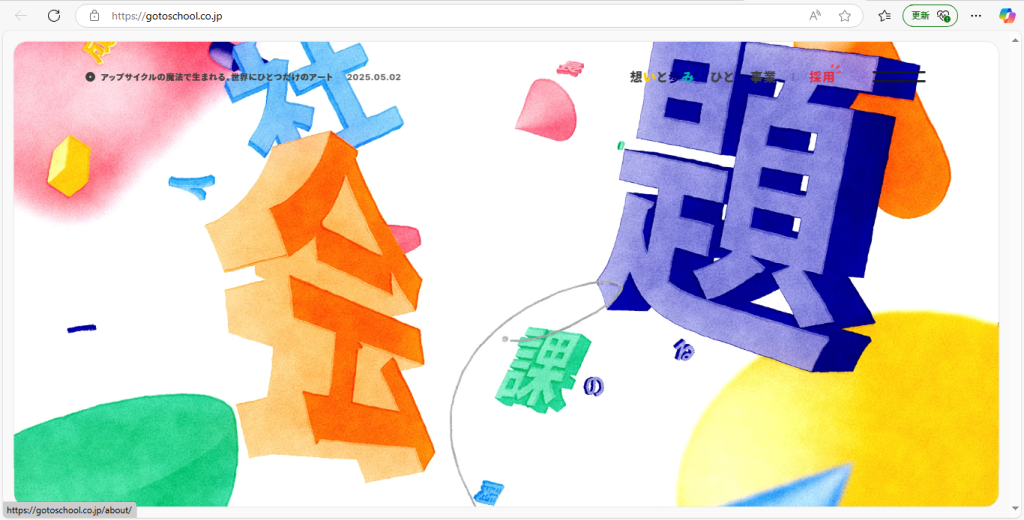
Striking Typography Designs
Typography has been evolving rapidly in recent web design trends.
One particularly notable technique is dynamic typography.
This approach brings movement and transformation to text, allowing for expressive, animated presentations that go beyond the limitations of static text.
Whether it’s real-time changes or interactivity triggered by cursor actions, this kind of typography not only catches the eye but also enhances the overall user experience.
Why I Chose This Topic
I was drawn to this technique because it goes beyond visual appeal—it enables dynamic and engaging presentations that are unique to the web.
Especially in contexts like sales pages or product introductions where it’s important to leave a strong impression quickly, dynamic typography can be highly effective.
How to Implement It
From a technical perspective, you can achieve dynamic typography using CSS and JavaScript, implementing animations and interactive effects on text elements.
Impact on the ICT Industry
Dynamic typography can significantly enhance the appeal of e-commerce sites and promotional pages.
In online shopping, where capturing user attention directly influences purchasing decisions, animated text can draw the eye, spark interest, and potentially increase click-through rates.
Benefits in Practice
Incorporating dynamic typography helps create websites that leave a lasting impression on users.
It’s not just for decoration—it’s a thoughtful way to enrich the user experience.
When applied effectively, it can make the site’s message more intuitive and engaging, reducing bounce rates and encouraging interaction.
As the line between design and technology continues to blur, such approaches will become key differentiators in web development.
Conclusion
As we head into 2025, web design trends continue to evolve.
Rather than simply aiming for visual polish, more emphasis is being placed on impactful effects and expressive motion.
Designs that evoke a sense of “fun” or leave a strong impression are increasingly in demand.
Moving forward, it’s no longer enough for web design to simply look good—it must also be usable, communicative, and memorable.
As developers, we need to think carefully about how to reflect these multifaceted goals in our code and design.
This kind of creative thinking will play a crucial role in elevating the overall quality of web design.