Study Session: Low-Code Development Experience Using OutSystems Part 3

I’m oz, and I’ll be covering this study session article. This time, we held our study session “Low-Code Development Experience with OutSystems Part 3,” so let me share how it went!

Check out the previous study session here!

Continuing from last time, this study session also aims to “deepen understanding of low-code development and OutSystems by experiencing development with OutSystems.” With many members joining for the first time this session, it became an even more lively study session.

The study session will proceed as follows:

① Development Experience with OutSystems
② Summary and Q&A

Development Experience with OutSystems

While delivering a PowerPoint presentation, we simultaneously progressed with actual development using the OutSystems environment. The main activities conducted this time were as follows:
Data Import and Export
・Let’s create an Entity (table)
・Let’s create master screens (list/detail) from an Entity: Scaffolding
・Let’s read and write Entity data from the created screens

Let’s create an entity (table)

First, add a table to store the data handled by the app.
Next, give the table a name that reflects its purpose so you can understand what kind of information it manages.
After creating the table, proceed to add columns. Assign each column a name corresponding to the actual item you wish to store, and simultaneously determine the data type based on the type of data to be stored, such as string, number, or date.

Let’s create master screens (list and detail) from an Entity: Scaffolding

Typically, when creating a master screen, you need to design and implement the list screen and detail screen from scratch. However, OutSystems offers a convenient mechanism that automatically generates a master screen to a certain extent simply by preparing a table.
This automatic generation feature is called Scaffolding. Using Scaffolding creates basic master screens such as list displays, registration, updates, and deletions as templates, greatly reducing development effort.

Let’s try reading and writing Entity data from the screen we created.

The master screen created with Scaffolding allows basic operations as-is, but adding further functionality makes it more practical. This time, we will enable direct data entry from the web screen, bulk data import using Excel files, and conversely, the ability to export data as Excel files.
From the web interface, you can register or update data one record at a time by setting values in the input fields on the screen and saving them. Additionally, by adding the Excel import feature, you can register or update multiple records at once simply by uploading an Excel file.
Furthermore, enabling the output of registered data as Excel files simplifies data verification and integration with other systems. By combining screen input, Excel import, and Excel export, the master screen is designed to be user-friendly for daily operations.

Summary

This study session covered even more practical content than the last one, and I believe it successfully conveyed the benefits of low-code development and OutSystems.
As development progressed, when questions or difficulties arose, nearby members actively exchanged ideas, discussing questions and issues together.
As a result, I feel that my understanding has deepened even further.

We plan to continue hosting study sessions focused on OutSystems development!
Stay tuned for our next article.

社内勉強会:Outsystemsを用いたローコード開発体験 Part3

今回の勉強会記事を担当します、ozです。 今回は社内勉強会「OutSystemsを用いたローコード開発体験 Part3」が開催されましたので、その様子をご紹介します!

前回の勉強会の様子はこちら

前回に引き続き、今回の勉強会も「OutSystemsでの開発を体験することで、ローコード開発やOutSystemsへの理解をより深めていくこと」を目的としています。 今回からの参加となるメンバーも多数おり、さらに活気ある勉強会となりました。

勉強会の流れは以下のとおりです。

① OutSystemsでの開発体験
② まとめ・質疑応答

OutSystemsでの開発体験

パワーポイントでの発表を行いながら、 一緒にOutSystemsの環境を用いて実際に開発を進めました。 今回実施した内容は、主に以下のとおりです。
データのインポート・エクスポート
・Entity(テーブル)を作ってみよう
・Entityからマスタ画面(一覧・詳細)を作ってみよう:Scaffolding
・作った画面からEntityデータを読み書きしてみよう

Entity(テーブル)を作ってみよう

まずは、アプリで扱うデータを保存するためのテーブルを追加します。
次に、そのテーブルがどのような情報を管理するものか分かるよう、用途に合わせた名前を付けます。
テーブルを作成したら、続いて列を追加していきます。 各列には、実際に保存したい項目に対応する名前を設定し、あわせて文字列・数値・日付など、格納するデータの種類に応じたデータ型を決めます。

Entityからマスタ画面(一覧・詳細)を作ってみよう:Scaffolding

通常、マスタ画面を作成する場合は、一覧画面や詳細画面を1から設計・実装する必要があります。 しかし、OutSystemsではテーブルを用意するだけで、マスタ画面を自動である程度作成してくれる便利な仕組みがあります。
この自動生成機能は Scaffolding(スキャフォールディング) と呼ばれています。 Scaffoldingを使うことで、一覧表示や登録・更新・削除といった基本的なマスタ画面がテンプレートとして作成されるため、開発の手間を大きく減らすことができます。

作った画面からEntityデータを読み書きしてみよう

Scaffoldingで作成したマスタ画面は、そのままでも基本的な操作が可能ですが、さらに機能を追加することで、より実用的になります。 今回は、Web画面から直接データを入力したり、Excelファイルを使ってデータを一括で取り込んだり、逆にExcelとして出力できるようにしていきます。
Web画面からの入力では、画面上の入力欄に値を設定して保存することで、1件ずつデータを登録・更新できます。 また、Excelの取り込み機能を追加すると、Excelファイルをアップロードするだけで、複数件のデータをまとめて登録・更新できるようになります。
さらに、登録されているデータをExcelファイルとして出力できるようにすることで、データの確認や他システムとの連携も簡単になります。 このように、画面入力・Excel取り込み・Excel出力を組み合わせることで、マスタ画面は日常業務で使いやすい形に仕上がっていきます。

まとめ

今回の勉強会では、前回よりもさらに実践的な内容を取り上げ、ローコード開発やOutSystemsの良さを伝えられた回になったと思います。
開発を進める中で分からないことや、うまくいかない点が出てきた際には、近くのメンバー同士で相談しながら、質問や問題点について活発な意見交換が行われていました。
その結果、理解もより一層深まったのではないかと感じています。

今後もOutSystemsの開発をテーマとした勉強会を開催予定です!
次回の記事もお楽しみに。

Study Session: About Cursor

For anyone who writes code, the editor is one of the most important tools. A good editor can speed up your work, reduce mistakes and even make learning new languages easier. Because of that, we regularly try new tools in our team.

We held a Cursor study session to explore this AI-assisted editor together. Some of us were already curious about it, others had never heard of it. The session was a chance to see what Cursor can do and to discuss whether it could improve our daily development work.

What Is Cursor?

Cursor is a modern code editor built on the same foundation as Visual Studio Code. It runs on Windows, macOS and Linux, and supports most VS Code extensions, themes and keybindings, so it feels familiar from the start.

What makes Cursor stand out is its deep AI integration. Right inside the editor you can:

  • Highlight code to get instant explanations
  • Generate new snippets or refactor existing ones
  • Ask it to write tests or documentation

This turns the editor into both a productivity tool and a learning companion.

Advantages of Using Cursor

During our session we noticed several advantages:

  • Familiar yet enhanced: Everyone who had used VS Code adapted quickly.
  • AI assistance built in: We could ask questions about our code and generate snippets without leaving the editor.
  • Cross-platform and extension support: All our favourite VS Code extensions worked.
  • Integrated terminal and Git: We compiled, ran and committed code without switching windows.
  • Helpful for learning: Beginners in the group liked being able to have the AI explain functions or concepts directly in the file.

Our Cursor study session showed us how an editor can do more than just hold text — it can actively support learning and speed up everyday tasks.

How to Install Cursor

We also walked through installation together. It’s straightforward:

  1. Go to cursor.sh.
  2. Download the installer for your operating system:
     – Windows: run the .exe file.
     – macOS: drag the app into Applications.
     – Linux: use the .AppImage file or your package manager.
  3. Open Cursor for the first time. You can sign in with GitHub or an email to sync your settings.
  4. Click the gear icon at the bottom left to adjust themes, fonts, and AI options.

Within minutes everyone in the room had it running.

How to Use Cursor

In the study session we tried out some basic workflows:

  • Opening a project: Drag a folder into Cursor to see all your files in the Explorer.
  • Creating a file: Ctrl + N to create, save with .html, .java, etc.
  • Using the terminal: `Ctrl + “ (backtick) to compile or run commands inside the editor.
  • Using AI: Highlight code and press Ctrl + I to ask for an explanation or to generate/refactor code.
  • Extensions: Click the Extensions icon to install language packs, snippets, linters or themes.

We even wrote a small HTML page and a simple Java program right there. Seeing Cursor’s auto-completion, automatic tag closing and AI suggestions made the exercises smoother for everyone, especially for members who were new to those languages.

Conclusion

Our Cursor 勉強会 confirmed that an editor can be more than just a place to type code. With easy installation, a familiar interface and powerful AI built in, Cursor helps both beginners and experienced developers learn faster and work more efficiently.

Stay tuned for the article!

社内勉強会:Cursorについて

コードを書く人にとって、エディターは最も重要なツールのひとつです。良いエディターは作業を効率化し、ミスを減らし、新しい言語の習得まで助けてくれます。だからこそ、私たちのチームでは定期的に新しいツールを試しています。

最近、私たちは AI 支援型エディター「Cursor」を一緒に学ぶために Cursor 勉強会を開催しました。以前から興味を持っていたメンバーもいれば、名前すら初めて聞くメンバーもいました。この勉強会は、Cursor がどのようなことができるのかを体験し、日々の開発業務に役立つかどうかを話し合う機会となりました。

Cursorとは?

Cursor は Visual Studio Code と同じ基盤の上に構築された最新のコードエディターです。Windows・macOS・Linux で動作し、ほとんどの VS Code 拡張機能・テーマ・キーバインドに対応しているため、最初から親しみやすく感じられます。

Cursor の最大の特徴は、深く統合された AI 機能です。エディターの中で次のようなことができます:

  • コードを選択して即座に解説を得る
  • 新しいコードスニペットを生成したり、既存コードをリファクタリングする
  • テストやドキュメントの作成を依頼する

これにより、エディターは生産性向上ツールであると同時に、学習のパートナーにもなります。

Cursorを使うメリット

勉強会の中で、私たちは次のような利点を感じました:

  • 馴染みやすく、強化されている:VS Code を使ったことがある人はすぐに慣れました。
  • AI アシストが標準搭載:コードに関する質問やスニペット生成がエディター内で完結。
  • クロスプラットフォーム&拡張対応:お気に入りの VS Code 拡張機能がそのまま使える。
  • 統合ターミナルと Git:ウィンドウを切り替えずにコンパイル・実行・コミットまで可能。
  • 学習に役立つ:初心者でもファイル内で関数や概念を直接 AI に解説してもらえた。

Cursor 勉強会を通じて、エディターが単なるテキスト編集以上のことをできると実感しました。学習支援や日常作業のスピードアップに大きく貢献します。

Cursorのインストール方法

勉強会ではインストールも一緒に行いました。手順は簡単です:

  1. cursor.sh にアクセス
  2. OS に合わせてインストーラーをダウンロード:
     – Windows:.exe ファイルを実行
     – macOS:アプリを Applications にドラッグ
     – Linux:.AppImage またはパッケージマネージャを使用
  3. 初回起動時に GitHub またはメールでサインインし、設定を同期
  4. 左下の歯車アイコンからテーマ・フォント・AI オプションを調整

数分で全員がセットアップ完了できました。

Cursorの使い方

勉強会では基本的なワークフローを試しました:

  • プロジェクトを開く:フォルダを Cursor にドラッグしてエクスプローラーに表示
  • ファイルを作成:Ctrl + N で新規作成し、.html や .java などの拡張子で保存
  • ターミナルを使う:`Ctrl + “(バッククオート)でエディター内コンパイル・実行
  • AI を使う:コードを選択し Ctrl + I で解説や生成・リファクタリングを依頼
  • 拡張機能:拡張アイコンから言語パック・スニペット・リンター・テーマなどをインストール

実際に HTML ページや簡単な Java プログラムもその場で書いてみました。Cursor の補完機能、タグ自動閉じ、AI 提案などで、特に初心者のメンバーでもスムーズに演習ができました。

まとめ

今回の Cursor 勉強会で、エディターが単なるコード入力の場を超え、学習を支援し日々の作業を効率化する存在になり得ることを確認できました。簡単なインストール、親しみやすいインターフェース、そして強力な AI 機能を備えた Cursor は、初心者から経験豊富な開発者まで、より速く学び・より効率的に作業する手助けとなります。

次回の勉強会の記事をお楽しみに!

In-House Study Session: About Git

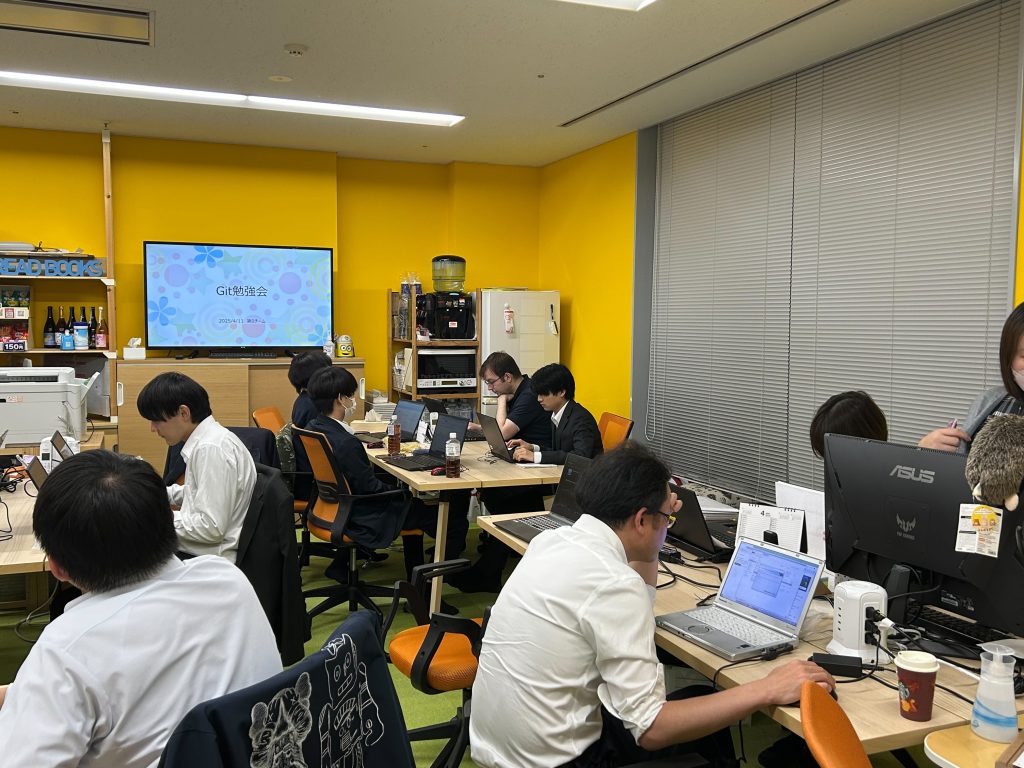
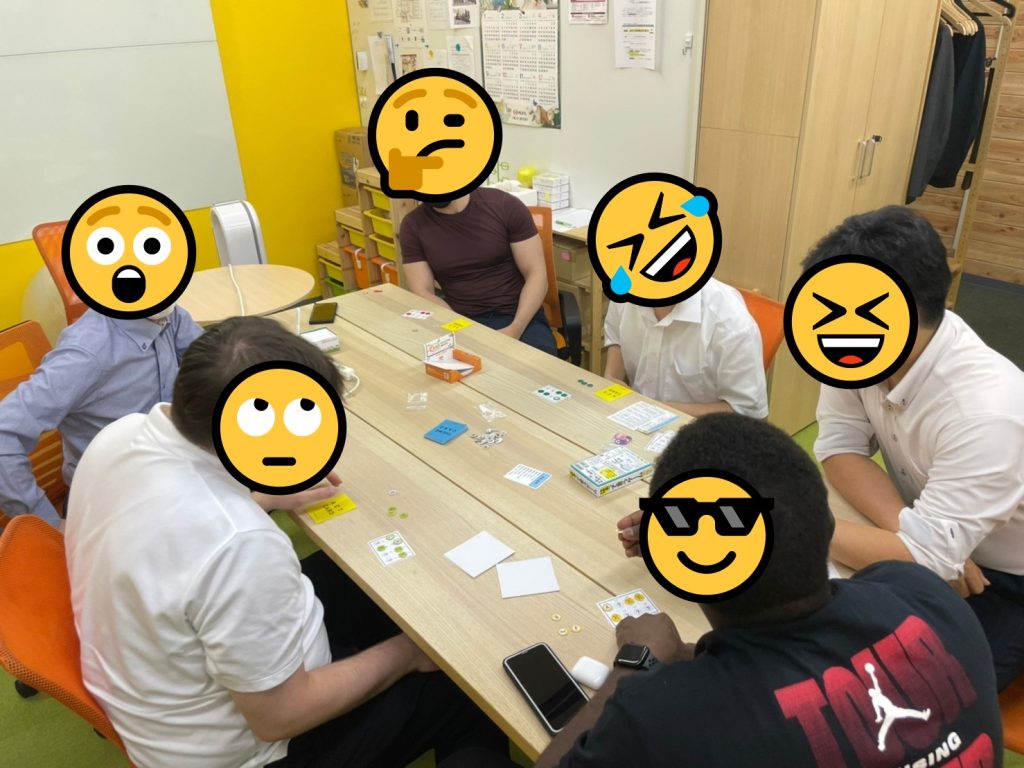
We held an in-house study session on Friday, April 11th this year, so we’d like to share a summary.The theme was “About Git.” This blog post is written by Xig from Team 0.

In this study session, we started by explaining what Git is in the first place,
and then actually used Git to experience what it can do.

The session followed the structure below:

  • What is Git?
  • Explanation of Git tools and web services
  • Setting up Git
  • Basic concepts of Git (terminology and what it can do)
Inside the Session

What is Git?
Since there were participants unfamiliar with Git or who hadn’t used it in a while,
we started from the very basics: “What is Git anyway?”
Personally, I’ve had some minimal experience with version control systems like SVN and Git,
but nowadays it feels like most projects around me manage their assets with Git.
How about you?

Explanation of Git Tools and Web Services
Here, we briefly introduced some tools and web services related to Git.
As for Git tools, those bundled with development environments like Eclipse are probably the most well-known.

[Web Services]

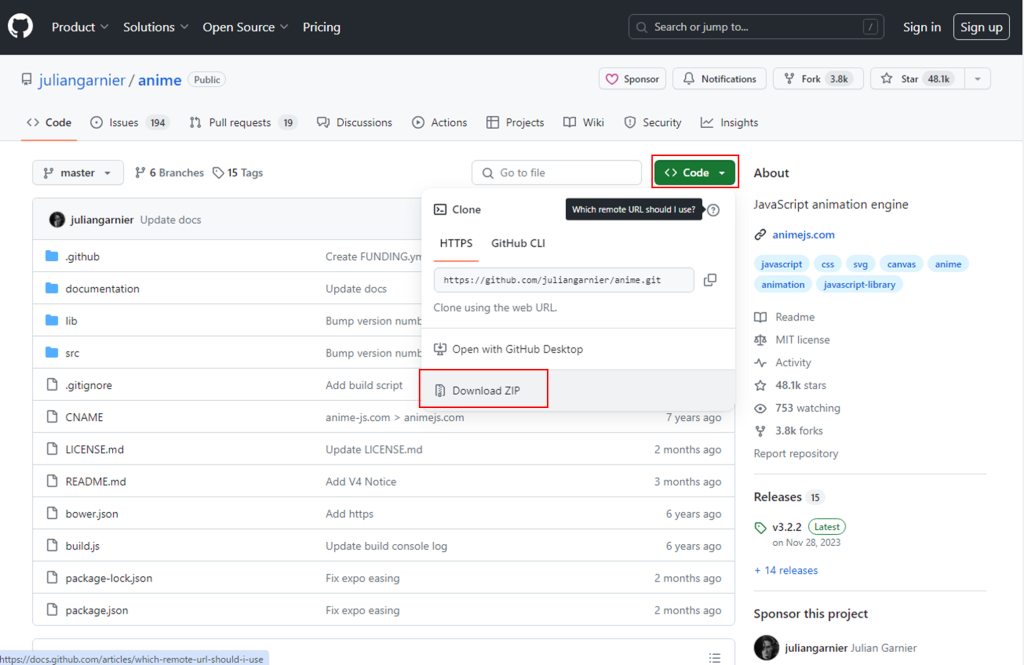
  • GitHub ★ Used during this session
  • AWS CodeCommit
  • Gitea

[Git Tools]

  • TortoiseGit ★ Used during this session
  • SourceTree
  • Development tools like Eclipse

Setting Up Git
In this session, to get hands-on with Git,
we used GitHub as the web service and TortoiseGit as a visual Git tool.
Just between us, when signing up for a GitHub account, email verification was required.
I tried doing it the day before the session,
but it took three hours for the verification email to arrive, so I was panicking a bit inside!

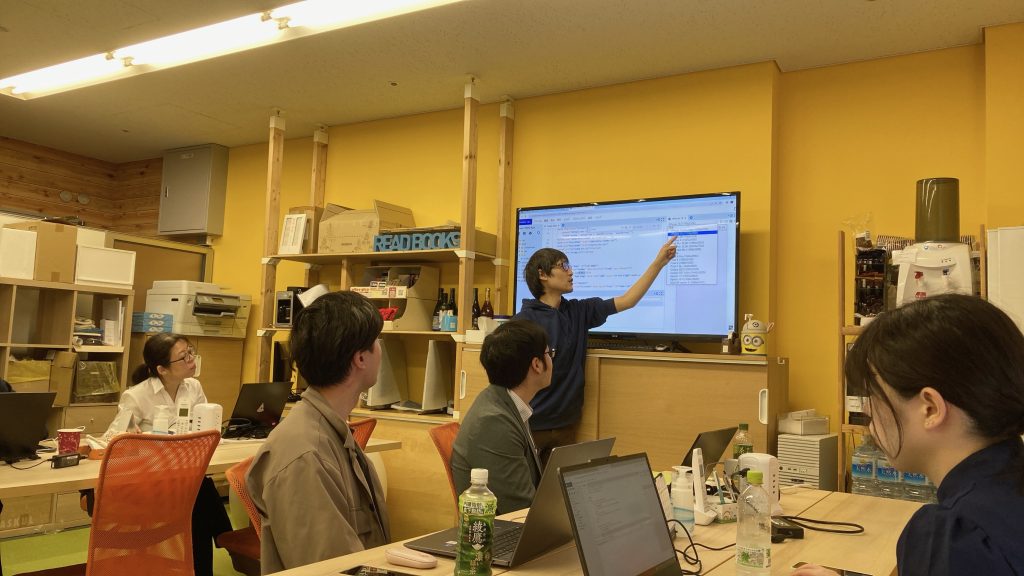
Basic Concepts of Git
We experienced a full range of Git operations, including:
“Cloning,” “Committing,” “Checking Differences,” “Viewing Logs,”
“Undoing Changes,” “Pulling,” “Pushing,” “Conflict Resolution,”
“Creating Branches,” and “Sending Pull Requests.”

One thing we noticed during the session was that the term “master branch”
is no longer commonly used.
It seems the term “main branch” has become the standard,
as “master” is now considered a potentially discriminatory term. That was a good learning moment.

Summary
In this session, we studied Git.
Personally, I hope this helped everyone understand even a little
the importance of asset management.
Whether you were revisiting Git after a long time or trying it for the first time—
you’ve now got the basics of Git down… right?

Stay tuned for our next study session article!

社内勉強会:Gitについて

今年の4月11日(金)に社内勉強会を行いましたので紹介します。
テーマは「Gitについて」です。ブログ記事担当はチーム0のxigです。

今回の勉強会では、Gitについてそもそも何?という説明を行い、
実際にGitを触って、どんなことができるか体験を行いました。

勉強会は以下の流れで実施しました。
・Gitとは何か
・Gitのツール、WEBサービス説明
・Gitの導入
・Gitの基礎説明(用語やどんなことができるか)

勉強会の様子

Gitとは何か

 勉強会では、Gitに馴染みの無い方、久しく触ってない方が居たので、
Gitとはそもそも何ぞ?
というところから始めました。私はバージョン管理システムとしてSVN、Gitを申し訳程度に触ったことがありますが、最近の身の回りだとGitで資産を管理しているプロジェクトが多い気がしますね。皆様はいかがでしょうか。

Gitのツール、WEBサービス説明

 ここでは、GitのツールとWEBサービスとして以下のようなサービスがあるとさらっと説明を行いました。Gitのツールとしては、Eclipseなどの開発ツールに付属されているものが割と有名どころかと思います。
【WEBサービス】
・GitHub ★当勉強会で使用
・AWS Code Commit
・Gitea
【Gitのツール】
・Tortoise Git ★当勉強会で使用
・SourceTree
・Eclipseなどの開発ツール

Gitの導入

 今回の勉強会では、Gitを触るべく、WEBサービスとして「GitHub」、Gitを視覚的に操作するツールとして「Tortoise Git」を導入しました。
ここだけの話、GitHubのアカウント登録の際に、メールで本人認証する必要があり、
私は勉強会の前日に実施したのですが、認証メールが飛んでくるのに3時間かかったので、内心凄く焦っていました。

Gitの基礎説明

 ここでは、Gitの一連の操作として、「クローン」「コミット」「差分確認」「ログの確認方法」「変更の取り消し」「プル」「プッシュ」「コンフリクト」「ブランチの作成」「プルリクエスト送信」を体験しました。

体験する中での気づきなのですが、最近は「マスターブランチ」という言葉は使用せず、
「メインブランチ」という言葉が使用されるようになったみたいですね。どうやら「マスター」という言葉が差別用語に当たるとのこと。ためになりましたね。

まとめ

 今回の勉強会ではGitについて学習しました。
これを通して、資産管理の大切さを少しでも感じ取って頂けたら良いかなと私個人は思っています。
久しぶりに触った人も、未経験だった人も
これでGitの基本操作はバッチリデスネ・・・

それでは、次回の勉強会の記事をお楽しみに!

社内勉強会「セキュリティの基本」

今回の社内勉強会を行いましたので紹介します。テーマは「セキュリティの基本」となります。担当はチーム0のチキンキウイです。

今回の勉強会では、セキュリティインシデントが発生した場合、どんなリスクがるのかや、
普段勤務する上で、どのような対策ができるのかの基本について学びました。

勉強会は以下の流で行いました
・セキュリティの必要性
・発生し得る問題について
・情報セキュリティ5か条
・ダンデライオンズで行っているセキュリティ対策について
・情報セキュリティクイズ

勉強会の様子

セキュリティの必要性

ここでは、セキュリティ対策や、インシデントが発生した場合に、会社に発生する
社会的な影響や、法律、道義的な影響について学びセキュリティの必要性について勉強を行いました。

発生し得る問題について

ここのでは起こりうるセキュリティリスクについて、実際の事例から学びました。
会社攻撃により会社が受ける影響だけでなく、セキュリティ対策不備があった場合に会社や、経営者に問われる法的責任、会社間の関係性の変化についても学びました。

情報セキュリティ5か条

IPAが紹介しているセキュリティ5箇条から、個人きを付けるべきセキュリティ対策について学びました。主に以下のことについて事例や、対策について確認しました。

1.OSやソフトウェアは常に最新の状態にしよう
2.ウイルス対策ソフトを導入しよう
3.パスワードを強化しよう
4.共有設定を見直そう
5.脅威や攻撃の手口を知ろう

まとめ

今回はセキュリティの重要性や、基本的な対策方法について勉強しました。
勉強会を行うにあったってIPAで公開されているセキュリティ対策ガイドラインを参考としています。
IPAでは情報セキュリティについて様々な情報を発信していますので興味あがある方はwebページをのぞいてみてください。

IPA 中小企業の情報セキュリティ対策ガイドライン
https://www.ipa.go.jp/security/guide/sme/about.html

次回の記事もお楽しみに。

Internal Training Session: Low-Code Development Experience Using Outsystems Part 2

Hello! I’m Ogi, responsible for this edition of our study session blog. I’m excited to share the highlights of our recent internal training session, “Low-Code Development Experience Using Outsystems Part 2”!

Check out the highlights from our previous study session here!

Building on our last session, the goal of this study meeting was to deepen our understanding of low-code development and Outsystems by gaining hands-on experience with Outsystems development. This time, we had many new members join us, making the session even more vibrant and engaging.

Here’s how the study session unfolded:

  1. Recap of the Previous Session
  2. Watching Educational Videos – Focus on UI Development
  3. Hands-On Development with Outsystems
  4. Summary and Q&A

Watching Educational Videos – Focus on UI Development

We kicked off the session by watching official educational videos provided by Outsystems. This time, the videos focused on UI development, where we learned the basics of screen widgets, variables, and client-side logic.

If you’re interested, you can watch the videos here (an Outsystems account is required).

Hands-On Development with Outsystems

After watching the videos, each participant used their own Outsystems environment to start developing. During this hands-on session, we primarily focused on:

  • Adding Widgets and Logic to Screen
  • Utilizing Aggregates ( Learn more about Aggregates here.)
  • Displaying Data on Screen

We experienced firsthand the unique advantages of developing with Outsystems, such as the simplicity of adding widgets through drag-and-drop and the visual manipulation capabilities provided by Aggregates for data retrieval and sorting.

Throughout the development process, we followed the instructor’s explanations and worked on our own projects, enhancing our practical skills.

While listening to the instructor’s explanations, we proceeded with development in our own environments.

Summary

In this study session, we tackled more hands-on content compared to the previous one, successfully conveying the benefits of low-code development and Outsystems. The development experience segment fostered active discussions and Q&A among the participants, further deepening our understanding.

We plan to continue hosting study sessions focused on Outsystems development in the future. Stay tuned for our next article!

社内勉強会:Outsystemsを用いたローコード開発体験 part2

今回の勉強会記事を担当します、第2ユニットのオギです。
今回は社内勉強会「Outsystemsを用いたローコード開発体験 part2」が開催されましたので、その様子をご紹介します!

前回の勉強会の様子はこちら

前回に引き続き、今回の勉強会も「Outsystemsでの開発を体験することで、ローコード開発やOutsystemsへの理解をより深めていくこと」を目的としています。
今回からの参加となるメンバーも多数いて、さらに活気ある勉強会となりました。

勉強会の流れは以下のとおりです。
⓪前回の勉強会のおさらい
①学習動画視聴 -UI開発について-
②Outsystemsでの開発体験
③まとめ、質疑応答

学習動画視聴 -UI開発について-

まずはOutsystemsが公式で提供している学習動画を視聴しました。
今回はUI開発についての動画を通して、画面のウィジェットや変数、クライアントのロジックについての基礎知識を学んでいきます。

こちらのリンクから視聴することができる(Outsystemsのアカウント取得が必要になります)ので、ご興味がある方は見てみてください!

Outsystemsでの開発体験

動画を視聴した後は、各々が構築したOutSystemsの環境を用いて実際に開発を進めました。

今回実施したのは主に以下のとおりです。
・画面へのウィジェット、ロジックの追加
・Aggregateの活用 (Aggregateについてはこちら)
・画面へのデータ表示

画面にウィジェットをドラッグ&ドロップで簡単に追加できたり、Aggregateを用いることでデータの取得やその条件、ソートなどを視覚的に操作できたりといったOutsystemsでの開発ならではの利点を体験しました。

講師の説明を聞きながら自分の環境で開発を進めていきます。

まとめ

今回の勉強会では前回よりもさらに実践的な内容を取り上げ、ローコード開発やOutsystemsの良さを伝えられた会になったかと思います。
開発体験のパートでは、近くのメンバーとの話し合いや質疑応答が盛んにおこなわれ、理解も一層深められたのではないでしょうか。

今後もOutsystemsの開発をテーマとした勉強会を開催予定です!
次回の記事もお楽しみに。

Internal Study Session: About Monaca

I’m “xig” from Unit 0, and I’ll be writing this study session article.

The theme of this in-house study session is “Monaca.”

It’s a familiar topic in Unit 0, but we held the study session with the aim of allowing inexperienced people to actually try it out and deepen their understanding. I was the one teaching, but the number of people who participated was greater than we initially expected, so I was a little nervous.

The study session went as follows:

①Outline of Monaca

②Introduction to the environment

③Hands on actually trying out Monaca

Overview of Monaca

In the 0th unit, we used Monaca’s cloud IDE (browser-based development environment),
so we focused on that and explained what Monaca is and what it can do.

I’ve found the following three points to be useful when actually using it,
and I hope that the participants were able to understand them.

〇 Easy to get started with an internet connection

〇 Easy to check operation (on a browser or smartphone)

〇 Easy to publish to the store

Environment introduction

After I gave them an overview, I had them create an account to start using Monaca.
I also showed them an actual screen and explained what items are available.
I personally didn’t feel any resistance to it because the UI is similar to the integrated development environment I normally use, but what did you all think?

Let’sTry

After the explanation, we did some coding exercises using Monaca’s sample programs. Monaca has pre-made templates, so this time we used the Todo app template, changed the background color, and added functions to add and delete database functions to actually create an app.

Summary

In this study session, we actually used Monaca to experience developing a simple app.

– I want to write a simple sample program, but setting up the environment is a hassle…
– I want to quickly develop an app for iOS or Android…
– I hope that when you feel like this, you will remember the exercises from today and put them to good use.

So, please look forward to the article from the next study session!